
Watch the critical surface preparation steps required before starting a jet interior refurbishment on a G5 aircraft.
Successfully applying high-end films starts long before the material touches the wall. This video documents the first day of work, focusing on sanding and cleaning walls to ensure a smooth, durable finish for the upcoming Di-noc installation. Taking the time to properly prep the substrate is the most important factor in achieving a long-lasting, professional result inside an aircraft cabin.
We break down the specific techniques used to ready the interior surfaces for vinyl installation. By focusing on these foundational steps, you can avoid common adhesion issues and ensure the final aesthetic meets the high standards required for aviation environments. Whether you are a professional installer or interested in the process of luxury aircraft upgrades, this footage highlights the patience and precision necessary for a successful project.
RM Elite Aero Yachts
Randy Miller
Randy@rmwraps.com - 208-696-1180.

Maintaining a clean job site is the first step toward a successful aircraft cabin remodel.
Before any major renovation begins, the interior must be stripped down to a blank canvas. This process involves clearing out debris and strategically placing materials so that every technician has the space they need to work efficiently. By focusing on site preparation early, we eliminate potential hazards and ensure that expensive aviation components remain protected throughout the duration of the project.
An organized workspace allows for a faster cabin refurbishment by keeping tools accessible and surfaces ready for immediate treatment. We prioritize this methodical approach to prevent delays caused by clutter or misplaced equipment. Seeing the cabin in this state helps you understand the logistics required to manage a high-end aviation interior project from start to finish.
RM Elite Aero Yachts
Randy Miller
Randy@rmwraps.com - 208-696-1180.
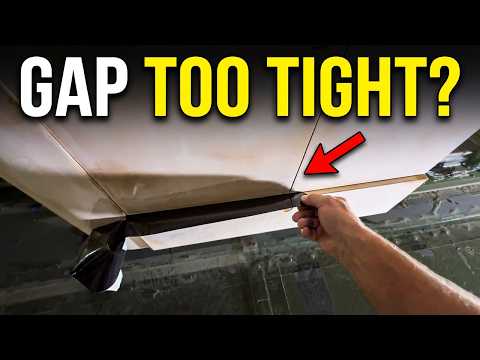
See the precise architectural film application process for interior surfaces. Learn the technique for a smooth finish.
Randy like to make a thickness testing from the Di-noc material. He layers 4 Di-noc strips together the make 32 mils thick. This makes sure the the door close ok without rubbing, The film will last a lot longer on the subjects too.
This demonstration focuses on applying 8-mil thick Di-noc material to intricate, curved geometry. For professionals working in high-end environments like yachts or private jets, managing material tension in tight spaces is essential for a clean, durable result.
We show the manual techniques required for a smooth curved surface wrap, ensuring the film conforms perfectly without lifting. This method emphasizes patience and layered precision, which are standard requirements for quality interior finishing. Mastering these steps helps avoid common vinyl installation failures on high-value assets.
RM Elite Aero Yachts
Randy Miller
Randy@rmwraps.com - 208-696-1180.

See the precision required for sanding a Jet G4 interior. We focus on surface preparation for a flawless finish.
Day two of our Jet G4 project centers on consistent surface preparation. We are using 220-grit sandpaper across the galley and bathroom areas to ensure every section is smooth and ready for the next stage of the interior restoration.
Achieving a professional finish on aviation interior components requires patience, especially when working on small, detailed sections. This footage demonstrates the methodical sanding techniques we use to maintain uniform results across complex geometries, helping you understand the manual labor involved in these high-end upgrades.
RM Elite Aero Yachts
Randy Miller
Randy@rmwraps.com - 208-696-1180.

Proper jet interior preparation is the foundation for any high-quality finish. See how we clean and sand surfaces before work.
Refurbishing an aircraft requires a rigorous approach to ensure every panel is ready for material application. This footage details the essential steps of surface preparation, from using glass cleaner on delicate components to sanding down specific areas to ensure a perfectly smooth base. We showcase the tools and cleaning materials necessary to maintain the strict standards required in aviation environments.
Whether you are involved in professional aircraft refurbishment or looking to understand the labor behind luxury aviation cleaning, this process highlights the patience needed for a flawless result. We focus on the meticulous removal of debris and the careful inspection of every corner to guarantee that no spots are missed during the cleaning phase.
RM Elite Aero Yachts
Randy Miller
Randy@rmwraps.com - 208-696-1180.

Mastering 3M Di-noc application on a complex aircraft component requires precision to avoid surface damage.
This demonstration focuses on the technical side of wrapping sensitive aviation hardware. We examine the specific steps for cleaning and preparing the substrate, which is a critical phase before any film is applied. Maintaining a clean environment in the hangar is mandatory when working with high-end materials that show imperfections easily.
The core of this process involves managing complex geometries, specifically navigating tight grooves while keeping the vinyl scratch free. By observing the technique used here, you can better understand how to maintain tension and avoid common pitfalls during professional vinyl installation. Achieving this level of detail ensures the final result meets the rigorous standards expected for aviation parts.
RM Elite Aero Yachts
Randy Miller
Randy@rmwraps.com - 208-696-1180.

Master your material management by pre-cutting vinyl to ensure you have enough coverage for your aircraft interior wrap. See how we verify inventory before starting the install.
Before applying any film to the cabin, it is essential to measure the subject and map out your material layout. This process involves identifying the exact depth and height of every wooden component to prevent waste and ensure you have sufficient stock on hand.
We focus on organizing each section of the wood grain components so they align perfectly during the final installation. By checking your inventory and planning the cuts ahead of time, you avoid the common pitfalls of running short on material during a high-stakes interior restoration.
RM Elite Aero Yachts
Randy Miller
Randy@rmwraps.com - 208-696-1180.

See how to apply 3M Di-Noc to a private jet door for a durable, clean interior finish. This technique ensures a smooth, factory-grade result on aviation hardware.
Working with architectural film in an aviation environment requires consistent heat control and steady hands. We demonstrate the full workflow for measuring and trimming material to fit complex door geometries, ensuring the adhesive bonds perfectly without air pockets. This process is essential for maintaining the integrity of the cabin interior.
Proper surface preparation is the foundation of any high-quality aviation wrap. By following these methodical steps, you can achieve a result that stands up to the wear of frequent cabin travel. We break down the specific tools and techniques needed to handle high-grade vinyl application for professional results.
RM Elite Aero Yachts
Randy Miller
Randy@rmwraps.com - 208-696-1180.
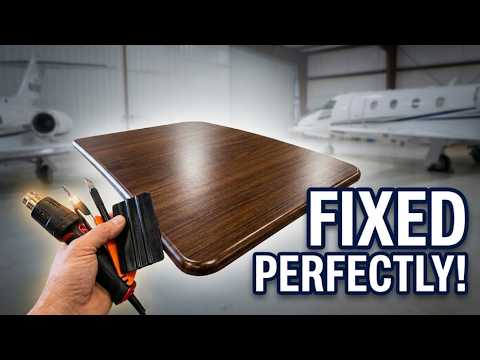
Restoring a private jet tray requires careful handling when applying wood grain film to irregular geometries.
When dealing with aviation hardware, the margin for error is slim. This project involves refinishing a tray that needs attention, requiring a methodical approach to ensure the material sits perfectly across all curves and edges. We use specific tools to ensure the adhesive bonds correctly without trapped air or uneven tension.
Every stage of this surface restoration highlights the importance of deliberate movement and constant pressure. By watching the vinyl wrap installation process from start to finish, you gain insight into how professional installers manage complex shapes to achieve a factory-grade finish on high-value assets.
RM Elite Aero Yachts
Randy Miller
Randy@rmwraps.com - 208-696-1180.

Learn the professional technique for wood grain matching to ensure your component assembly results in a seamless wood finish.
Achieving a high-quality look requires precision when aligning materials. This guide walks through the specific steps for preparing trays and positioning pieces so the patterns align perfectly across the entire surface.
Applying these woodworking techniques helps you maintain a cohesive aesthetic, especially when working with patterned materials. By focusing on the orientation of each piece before final installation, you can avoid common errors that disrupt the visual flow of the final product. Wood grain matching is the preferred way to achieve a professional result.
RM Elite Aero Yachts
Randy Miller
Randy@rmwraps.com - 208-696-1180.

Watch the installation process for aircraft cockpit interior paneling. See how to secure wooden panels for a professional finish.
Working on the interior of an aviation asset requires precision and careful handling of materials. This demonstration shows the specific steps taken to attach and secure the wooden paneling to the wall, ensuring that every piece fits snugly within the confined geometry of the cockpit environment.
Whether you are customizing a private jet or performing a restoration, understanding the method for wood panel installation is vital for achieving a clean, durable result. Proper alignment and attachment techniques prevent movement and rattling, which are essential considerations for any custom interior project.
RM Elite Aero Yachts
Randy Miller
Randy@rmwraps.com - 208-696-1180.
