
-
 • 9/14/26
Wrapping a Entryway private jet left side.
Watch the installation process for aircraft cockpit interior paneling. See how to secure wooden panels for a professional finish.
Working on the interior of an aviation asset requires precision and careful handling of materials. This demonstration shows the specific steps taken to attach and secure the wooden paneling to the wall, ensuring that every piece fits snugly within the confined geometry of the cockpit environment.
Whether you are customizing a private jet or performing a restoration, understanding the method for wood panel installation is vital for achieving a clean, durable result. Proper alignment and attachment techniques prevent movement and rattling, which are essential considerations for any custom interior project.
RM Elite Aero Yachts
Randy Miller
Randy@rmwraps.com - 208-696-1180.
-
 • 9/14/26
Talking about wrapping a tray for private jet.
Learn the professional technique for wood grain matching to ensure your component assembly results in a seamless wood finish.
Achieving a high-quality look requires precision when aligning materials. This guide walks through the specific steps for preparing trays and positioning pieces so the patterns align perfectly across the entire surface.
Applying these woodworking techniques helps you maintain a cohesive aesthetic, especially when working with patterned materials. By focusing on the orientation of each piece before final installation, you can avoid common errors that disrupt the visual flow of the final product. Wood grain matching is the preferred way to achieve a professional result.
RM Elite Aero Yachts
Randy Miller
Randy@rmwraps.com - 208-696-1180.
-
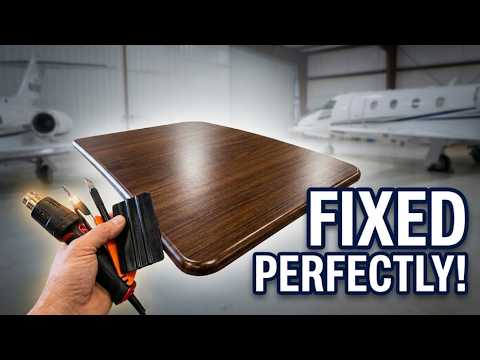 • 9/14/26
Showing you a tray wrap in a private jet that I need to fix
Restoring a private jet tray requires careful handling when applying wood grain film to irregular geometries.
When dealing with aviation hardware, the margin for error is slim. This project involves refinishing a tray that needs attention, requiring a methodical approach to ensure the material sits perfectly across all curves and edges. We use specific tools to ensure the adhesive bonds correctly without trapped air or uneven tension.
Every stage of this surface restoration highlights the importance of deliberate movement and constant pressure. By watching the vinyl wrap installation process from start to finish, you gain insight into how professional installers manage complex shapes to achieve a factory-grade finish on high-value assets.
RM Elite Aero Yachts
Randy Miller
Randy@rmwraps.com - 208-696-1180.
-
 • 9/14/26
How to wrap a private jet door with the 3M Di-noc material.
See how to apply 3M Di-Noc to a private jet door for a durable, clean interior finish. This technique ensures a smooth, factory-grade result on aviation hardware.
Working with architectural film in an aviation environment requires consistent heat control and steady hands. We demonstrate the full workflow for measuring and trimming material to fit complex door geometries, ensuring the adhesive bonds perfectly without air pockets. This process is essential for maintaining the integrity of the cabin interior.
Proper surface preparation is the foundation of any high-quality aviation wrap. By following these methodical steps, you can achieve a result that stands up to the wear of frequent cabin travel. We break down the specific tools and techniques needed to handle high-grade vinyl application for professional results.
RM Elite Aero Yachts
Randy Miller
Randy@rmwraps.com - 208-696-1180.
-
 • 9/14/26
Pre cut the vinyl from the roll to see how much I have.
Master your material management by pre-cutting vinyl to ensure you have enough coverage for your aircraft interior wrap. See how we verify inventory before starting the install.
Before applying any film to the cabin, it is essential to measure the subject and map out your material layout. This process involves identifying the exact depth and height of every wooden component to prevent waste and ensure you have sufficient stock on hand.
We focus on organizing each section of the wood grain components so they align perfectly during the final installation. By checking your inventory and planning the cuts ahead of time, you avoid the common pitfalls of running short on material during a high-stakes interior restoration.
RM Elite Aero Yachts
Randy Miller
Randy@rmwraps.com - 208-696-1180.
-
 • 9/14/26
Wrapping a complex surface with 3M Di-noc
Mastering 3M Di-noc application on a complex aircraft component requires precision to avoid surface damage.
This demonstration focuses on the technical side of wrapping sensitive aviation hardware. We examine the specific steps for cleaning and preparing the substrate, which is a critical phase before any film is applied. Maintaining a clean environment in the hangar is mandatory when working with high-end materials that show imperfections easily.
The core of this process involves managing complex geometries, specifically navigating tight grooves while keeping the vinyl scratch free. By observing the technique used here, you can better understand how to maintain tension and avoid common pitfalls during professional vinyl installation. Achieving this level of detail ensures the final result meets the rigorous standards expected for aviation parts.
RM Elite Aero Yachts
Randy Miller
Randy@rmwraps.com - 208-696-1180.
-
 • 9/14/26
Almost ready the wrap the private jet with 3M Di-noc
Proper jet interior preparation is the foundation for any high-quality finish. See how we clean and sand surfaces before work.
Refurbishing an aircraft requires a rigorous approach to ensure every panel is ready for material application. This footage details the essential steps of surface preparation, from using glass cleaner on delicate components to sanding down specific areas to ensure a perfectly smooth base. We showcase the tools and cleaning materials necessary to maintain the strict standards required in aviation environments.
Whether you are involved in professional aircraft refurbishment or looking to understand the labor behind luxury aviation cleaning, this process highlights the patience needed for a flawless result. We focus on the meticulous removal of debris and the careful inspection of every corner to guarantee that no spots are missed during the cleaning phase.
RM Elite Aero Yachts
Randy Miller
Randy@rmwraps.com - 208-696-1180.
-
 • 9/14/26
Restoring the Jet G5: Day 2 Interior Prep
See the precision required for sanding a Jet G4 interior. We focus on surface preparation for a flawless finish.
Day two of our Jet G4 project centers on consistent surface preparation. We are using 220-grit sandpaper across the galley and bathroom areas to ensure every section is smooth and ready for the next stage of the interior restoration.
Achieving a professional finish on aviation interior components requires patience, especially when working on small, detailed sections. This footage demonstrates the methodical sanding techniques we use to maintain uniform results across complex geometries, helping you understand the manual labor involved in these high-end upgrades.RM Elite Aero Yachts
Randy Miller
Randy@rmwraps.com - 208-696-1180.
-
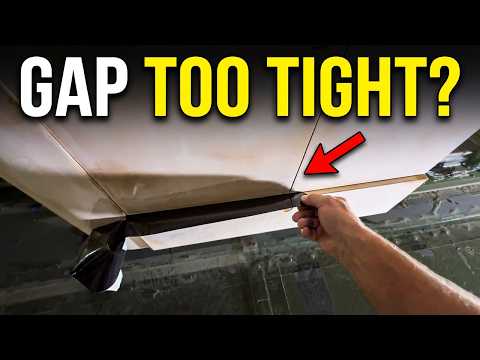 • 9/14/26
4 Layers Deep: How to Get a Perfect Finish on private jet Interior
See the precise architectural film application process for interior surfaces. Learn the technique for a smooth finish.
Randy like to make a thickness testing from the Di-noc material. He layers 4 Di-noc strips together the make 32 mils thick. This makes sure the the door close ok without rubbing, The film will last a lot longer on the subjects too.
This demonstration focuses on applying 8-mil thick Di-noc material to intricate, curved geometry. For professionals working in high-end environments like yachts or private jets, managing material tension in tight spaces is essential for a clean, durable result.
We show the manual techniques required for a smooth curved surface wrap, ensuring the film conforms perfectly without lifting. This method emphasizes patience and layered precision, which are standard requirements for quality interior finishing. Mastering these steps helps avoid common vinyl installation failures on high-value assets.
RM Elite Aero Yachts
Randy Miller
Randy@rmwraps.com - 208-696-1180.
-
 • 9/14/26
Cleaning the project before working subjects,
Maintaining a clean job site is the first step toward a successful aircraft cabin remodel.
Before any major renovation begins, the interior must be stripped down to a blank canvas. This process involves clearing out debris and strategically placing materials so that every technician has the space they need to work efficiently. By focusing on site preparation early, we eliminate potential hazards and ensure that expensive aviation components remain protected throughout the duration of the project.
An organized workspace allows for a faster cabin refurbishment by keeping tools accessible and surfaces ready for immediate treatment. We prioritize this methodical approach to prevent delays caused by clutter or misplaced equipment. Seeing the cabin in this state helps you understand the logistics required to manage a high-end aviation interior project from start to finish.
RM Elite Aero Yachts
Randy Miller
Randy@rmwraps.com - 208-696-1180.
-
 • 9/14/26
Restoring a Private Jet: The First Steps
Watch the critical surface preparation steps required before starting a jet interior refurbishment on a G5 aircraft.
Successfully applying high-end films starts long before the material touches the wall. This video documents the first day of work, focusing on sanding and cleaning walls to ensure a smooth, durable finish for the upcoming Di-noc installation. Taking the time to properly prep the substrate is the most important factor in achieving a long-lasting, professional result inside an aircraft cabin.
We break down the specific techniques used to ready the interior surfaces for vinyl installation. By focusing on these foundational steps, you can avoid common adhesion issues and ensure the final aesthetic meets the high standards required for aviation environments. Whether you are a professional installer or interested in the process of luxury aircraft upgrades, this footage highlights the patience and precision necessary for a successful project.
RM Elite Aero Yachts
Randy Miller
Randy@rmwraps.com - 208-696-1180.
-
• 9/8/26
Almost ready the wrap the private jet with 3M Di-noc
Proper jet interior preparation is the foundation for any high-quality finish. See how we clean and sand surfaces before work.
Refurbishing an aircraft requires a rigorous approach to ensure every panel is ready for material application. This footage details the essential steps of surface preparation, from using glass cleaner on delicate components to sanding down specific areas to ensure a perfectly smooth base. We showcase the tools and cleaning materials necessary to maintain the strict standards required in aviation environments.
Whether you are involved in professional aircraft refurbishment or looking to understand the labor behind luxury aviation cleaning, this process highlights the patience needed for a flawless result. We focus on the meticulous removal of debris and the careful inspection of every corner to guarantee that no spots are missed during the cleaning phase.
RM Elite Aero Yachts
Randy Miller
Randy@rmwraps.com - 208-696-1180.
-
• 9/8/26
Restoring the Jet G5: Day 2 Interior Prep
See the precision required for sanding a Jet G5 interior. We focus on surface preparation for a flawless finish.
Day two of our Jet G5 project centers on consistent surface preparation. We are using 220-grit sandpaper across the galley and bathroom areas to ensure every section is smooth and ready for the next stage of the interior restoration.
Achieving a professional finish on aviation interior components requires patience, especially when working on small, detailed sections. This footage demonstrates the methodical sanding techniques we use to maintain uniform results across complex geometries, helping you understand the manual labor involved in these high-end upgrades.
RM Elite Aero Yachts
Randy Miller
Randy@rmwraps.com - 208-696-1180.
-
• 9/8/26
Cleaning the project before working subjects,
Maintaining a clean job site is the first step toward a successful aircraft cabin remodel.
Before any major renovation begins, the interior must be stripped down to a blank canvas. This process involves clearing out debris and strategically placing materials so that every technician has the space they need to work efficiently. By focusing on site preparation early, we eliminate potential hazards and ensure that expensive aviation components remain protected throughout the duration of the project.
An organized workspace allows for a faster cabin refurbishment by keeping tools accessible and surfaces ready for immediate treatment. We prioritize this methodical approach to prevent delays caused by clutter or misplaced equipment. Seeing the cabin in this state helps you understand the logistics required to manage a high-end aviation interior project from start to finish.
RM Elite Aero Yachts
Randy Miller
Randy@rmwraps.com - 208-696-1180.
-
• 9/8/26
Restoring a Private Jet: The First Steps
Watch the critical surface preparation steps required before starting a jet interior refurbishment on a G5 aircraft.
Successfully applying high-end films starts long before the material touches the wall. This video documents the first day of work, focusing on sanding and cleaning walls to ensure a smooth, durable finish for the upcoming Di-noc installation. Taking the time to properly prep the substrate is the most important factor in achieving a long-lasting, professional result inside an aircraft cabin.
We break down the specific techniques used to ready the interior surfaces for vinyl installation. By focusing on these foundational steps, you can avoid common adhesion issues and ensure the final aesthetic meets the high standards required for aviation environments. Whether you are a professional installer or interested in the process of luxury aircraft upgrades, this footage highlights the patience and precision necessary for a successful project.
RM Elite Aero Yachts
Randy Miller
Randy@rmwraps.com - 208-696-1180.
-
 • 9/8/26
Seattle interior yacht wrap - day 10
See how to apply wood grain vinyl wrap to yacht cabinet doors and panels. Learn the professional techniques for a seamless finish. This update covers day 10 of the yacht interior refit. I focus on the VIP room, specifically covering the process of applying vinyl to four cabinet doors and the surrounding woodwork. This is for anyone interested in boat interior renovation or learning how to improve the finish of their own vessel.By the end of this update, you will see how cabinet door wrapping can change the look of a space without a full remodel. I demonstrate the technique used to get a clean finish around the edges and behind the cabinets, which is essential for any DIY yacht project. If you are planning a similar upgrade, these methods will help you achieve a professional result.Subscribe for weekly boat renovation breakdowns, and comment below if you want to see the next section of the yacht I am working on!
RM Elite Aero Yachts
Randy Miller
Randy@rmwraps.com - 208-696-1180.
-
 • 9/8/26
Seattle interior yacht wrap - day 1
Follow along with this interior yacht wrap project in Seattle. See how to prep surfaces and remove hardware for a clean finish.
This video documents the first day of an interior yacht wrap job. If you are interested in marine aesthetic upgrades, this breakdown shows the necessary preparation steps before applying vinyl. I focus on removing hardware and prepping surfaces to ensure the new color adheres properly.
Professional yacht wrapping requires careful attention to detail, especially when working with interior panels. I am swapping the original blue finish for a new color, and the process starts with methodical disassembly. Learn how to prepare a cabin for a yacht wrap by watching how I strip the doors and remove all removable components.
-
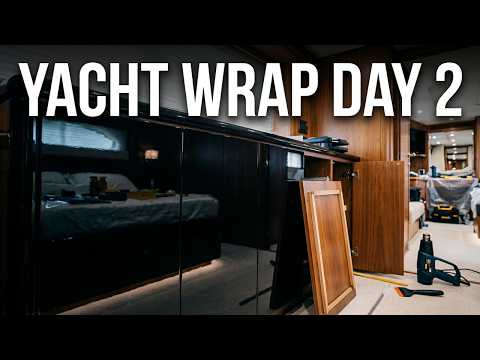 • 9/8/26
Seattle interior yacht wrap - day 2
Watch the progress of a professional yacht wrap in Seattle as we tackle cabinet reassembly and ceiling installation on day two.
This video documents the technical steps required for a high-end boat interior refit. If you are interested in marine vinyl wrap techniques or the logistics of large-scale yacht restoration, this walkthrough shows exactly how we manage tight spaces and intricate surfaces. We focus on the practical application of materials to achieve a seamless finish on complex interior components.
Today covers the reassembly of cabinet doors and ceiling sections after applying the new finish. Seeing the yacht wrap come together requires precision, especially when aligning patterns on custom boat cabinetry. You will see how we handle specific interior sections and the careful handwork needed to ensure the vinyl adheres correctly to all curved and flat surfaces.
RM Elite Aero Yachts
Randy Miller
Randy@rmwraps.com - 208-696-1180.
-
 • 9/8/26
Seattle interior yacht wrap - day 3
See how to approach vinyl wrapping a door on a yacht interior renovation project. Learn how to remove frames for a clean finish.
This video documents the third day of a professional marine vinyl wrap project on a Seattle yacht. If you are interested in boat interior refit work, this process shows the practical steps for wrapping complex door frames and surrounding surfaces. I demonstrate why removing hardware is often necessary to achieve a seamless look rather than cutting into the material directly.
For those tackling their own vinyl wrapping a door project, you will see the specific techniques used to ensure long-lasting adhesion and a high-quality appearance. I explain the decision-making process behind taking apart door components versus leaving them in place, providing a realistic look at the challenges involved in high-end marine interior work. Mastering these details is crucial for anyone learning professional vinyl installation.
RM Elite Aero Yachts
Randy Miller
Randy@rmwraps.com - 208-696-1180.
-
 • 9/8/26
Seattle interior yacht wrap - day 3.5
This project covers the exact process of installing a closet door frame and the doors on both sides. If you are planning a DIY closet project, this breakdown shows you the reality of the work involved, specifically focusing on the time commitment required to get everything aligned and finished properly. I track the progress over three and a half days to give you a realistic view of the effort required for this type of home improvement task.
Whether you are tackling door installation tips for the first time or just want to see how a professional handles the frame assembly, this walkthrough provides the necessary context. You will see exactly how the framing comes together and why getting the doors hung correctly is the most time-consuming part of the job.
RM Elite Aero Yachts
Randy Miller
Randy@rmwraps.com - 208-696-1180.
-
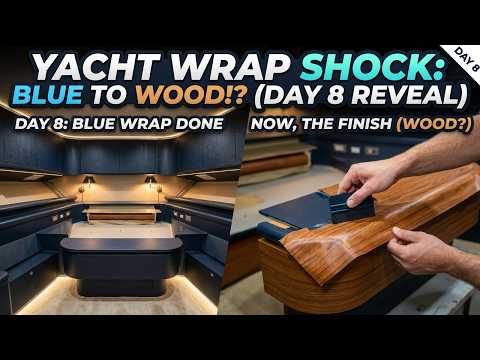 • 9/8/26
Seattle interior yacht wrap - day 8
This video documents day eight of an ongoing yacht interior refit. If you are interested in boat interior work or professional marine carpentry, this look at the VIP room renovation provides a practical view of the framing process required for these luxury spaces. I walk through the structural framework installed around the room to give you a clear understanding of the construction phases involved in this Seattle yacht job.
While this update focuses specifically on the framing stage of the Seattle yacht job, I am already working on the next phase. Watching this series helps you understand the sequencing of a yacht interior refit, from initial framework to final finish. This Seattle yacht job demonstrates the attention to detail required for high-end marine vessel renovations.
RM Elite Aero Yachts
Randy Miller
Randy@rmwraps.com - 208-696-1180.
-
 • 9/8/26
Seattle interior yacht wrap - day 9
See the yacht interior wrap process on day 9 of our Seattle boat restoration.
This update focuses on the technical aspects of a yacht renovation, specifically targeting the upper interior sections. If you are following our yacht project, this walkthrough details exactly how we prepared the surfaces and executed the wrap while the structure was open. We also take a full tour of the cabin spaces to show the current state of the cabinets and main living areas.
Whether you are planning your own yacht refit or just enjoy watching the progress of a complex marine build, this video offers a clear look at the practical steps involved in interior finishing. We break down the challenges of working on the upper poles and demonstrate the progress made on the interior layout.
RM Elite Aero Yachts
Randy Miller
Randy@rmwraps.com - 208-696-1180.
-
 • 9/8/26
Last day of working on an Interior Yacht wrap in the Gulf Shores using the Architectural finishes
See the final results of an interior yacht wrap in Gulf Shores, Alabama. This walkthrough showcases the application of architectural finishes.
Randy Miller of Armwraps demonstrates the completed look of the project, highlighting how specific architectural films were applied to various interior sections of the vessel. The process involved wrapping 75% of the yacht using two different patterns to achieve a cohesive, updated aesthetic across the cabin spaces.
By examining this yacht interior wrap, you can see how high-quality vinyl materials hold up on complex surfaces and the level of detail required for marine installations. Whether you are an enthusiast or a professional installer, observing these finished sections provides insight into the precision needed for large-scale architectural wrapping projects.RM Elite Aero Yachts
Randy Miller
Randy@rmwraps.com - 208-696-1180.
-
 • 9/8/26
Yacht wrapping - Gulf Shores in the beginning
See the starting phase of a professional yacht wrapping project in Gulf Shores as we prepare for a major interior update.
This video provides a detailed walkthrough of the vessel before we begin applying materials. We are preparing to cover 75% of the yacht interior using two distinct styles of architectural film. This footage offers a look at the current state of the boat interior, highlighting the cabinetry, sleeping quarters, and workspace that will soon undergo a significant change.
Understanding the layout is crucial when planning a marine vinyl wrap of this scale. By documenting the surfaces before installation, we ensure that every cut and application is measured for precision. Whether you are a professional installer or interested in boat customization, this walkthrough sets the stage for the upcoming transformation process.RM Elite Aero Yachts
Randy Miller
Randy@rmwraps.com - 208-696-1180.
-
 • 9/8/26
Working on an Interior Yacht wrap day 1 in Gulf Shores using Architectural finishes
See the start of an interior yacht wrap project in Gulf Shores. Learn professional techniques for architectural finishes.
This footage covers the first day of a cabinetry renovation, focusing on how to prepare and apply vinyl to galley surfaces. Whether you are a professional installer or looking to update your own space, this breakdown highlights the precision required for high-end results.
The process emphasizes clean execution, such as creating precise butt joints and managing vinyl wrapping from the center outward. We also cover the initial setup for appliances like the oven and sink area, ensuring every edge is secure for a seamless finish. Mastery of these techniques is essential for handling the complex surfaces found in marine environments.RM Elite Aero Yachts
Randy Miller
Randy@rmwraps.com - 208-696-1180.
-
 • 9/8/26
Working on Interior yacht wrapping Day 2 in Gulf Shore using the Architectural finishes
See the progress on Day 2 of this yacht wrapping project as we apply professional architectural finishes to the interior.
This video documents the second day of our installation process on a boat project. We focus specifically on interior cabinets and drawers, demonstrating the precision required to handle handles and complex corners.
Using high-quality cabinet vinyl allows us to update the space while ensuring durability against the marine environment. You will see how we handle the refrigerator and prep the remaining sections for the next phase of the boat renovation.RM Elite Aero Yachts
Randy Miller
Randy@rmwraps.com - 208-696-1180.
-
 • 9/8/26
Working on an interior Yacht wrap Day 3 in Gulf Shore - Gallery wrap
Follow the Day 3 progress of this yacht interior wrap, focusing on galley cabinetry installation and refined finishes.
We are continuing the renovation on the galley area, focusing on installing doors and drawers to complete the primary cabinetry structure. This stage of the project requires careful alignment to ensure a clean, seamless look throughout the space.
We are utilizing architectural film to achieve a durable finish on the boat cabinetry. Some sections were refined for a higher quality result, and we are currently prepping surfaces for future modifications. This galley renovation is all about precision and planning for the next phase of the project.RM Elite Aero Yachts
Randy Miller
Randy@rmwraps.com - 208-696-1180.
-
 • 9/8/26
Working on an Interior Yacht wrap day 4 in Gulf Shore using the Architectural finishes
See how to apply interior yacht wrap materials with precision on day four of this Gulf Shores boat renovation project.
This update focuses on the master bedroom door and surrounding cabinetry. I demonstrate the correct method for aligning wood grain vinyl to ensure the pattern runs horizontally, which is critical for a professional finish on marine surfaces. You will see how we handle the complexities of wrapping both sides of the door and managing tricky cut lines around room vents.
Achieving a seamless look requires patience and the right architectural films for the job. By focusing on these specific finishing touches, we ensure the installation can withstand the environment of the vessel. If you are planning a similar project, this walkthrough covers the techniques needed to handle edges and trim properly.RM Elite Aero Yachts
Randy Miller
Randy@rmwraps.com - 208-696-1180.
-
 • 9/8/26
Working on an Interior Yacht wrap day 5 in Gulf Shore using the Architectural finishes - Master room
Follow the progress of our yacht interior wrap as we focus on the master bedroom finishes during day five of the project.
This stage of the marine renovation involves applying metallic vinyl to the bed frame and cabinetry. Achieving a seamless look requires precise architectural film application to ensure the material sits perfectly against the yacht's unique curved surfaces.
Beyond the bed, we are refinishing the desk area to match the master suite's updated aesthetic. This footage highlights the specific techniques used for high-end vinyl installation in a confined space, focusing on the patience and steady hand needed for a professional finish on luxury assets.RM Elite Aero Yachts
Randy Miller
Randy@rmwraps.com - 208-696-1180.
-
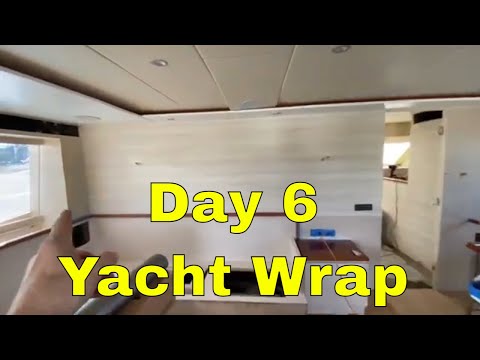 • 9/8/26
Working on an Interior yacht wrap Master bedroom walls and other wall wraps at Gulf shores
Follow along on day six of this yacht interior wrap as we install vinyl on master bedroom walls and cabinetry. See how we manage the precise application process to restore the cabin.
This project involves applying specialized architectural film to various sections of the boat, including complex wall surfaces and furniture. During this stage, a customer assisted with the vinyl installation, which helped streamline the application process for the bed area and surrounding doors.
I also demonstrate the double-cut method to ensure precise alignment on these curved surfaces. This technique is essential for achieving a professional finish on any boat renovation where tolerances are tight and the material must be perfectly placed.RM Elite Aero Yachts
Randy Miller
Randy@rmwraps.com - 208-696-1180.
-
 • 9/8/26
Working on an Interior Yacht wrap Day 7 in the Gulf Shores using the Architectural finishes
Follow along with our interior yacht wrap project as we reach day seven, focusing on master bedroom cabinetry and wall details.
This update covers the steady progress of installing architectural finishes across the boat's interior. We are working through the fine-tuning of cabinetry installation and adjusting door alignments to ensure every structural element meets our high standards for a clean, professional look. Seeing the space come together requires careful attention to detail on the stairs and various trim areas.
By documenting this stage of the project, you can see how we manage the specific challenges of a vinyl boat wrap in tight quarters. Proper material application is essential for durability, especially when working on curved surfaces and custom woodwork. We are preparing to shift our focus in the next update to the lower sections of the vessel to continue refining the overall aesthetic.RM Elite Aero Yachts
Randy Miller
Randy@rmwraps.com - 208-696-1180.
-
 • 9/8/26
Working on an Interior Yacht wrap Day 8 in the Gulf Shores using the Architectural finishes
See the progress on this interior yacht wrap project as we install wood paneling throughout the cabin and main hallway areas.
We are now on day eight of this boat renovation, focusing on the finer details of the living space. The team has successfully finished the walls on both sides of the entryway and moved on to the complex trim work found under the steps. By applying high-quality architectural finishes to these surfaces, we ensure a durable and refined aesthetic that stands up to the marine environment.
This stage of the yacht interior project highlights the importance of precision when handling tight corners and cabin ceilings. We walk through the completed laundry area and hallway to show how the material integrates with the existing structure. Consistent application techniques are key to achieving a professional finish that elevates the overall look of the vessel.RM Elite Aero Yachts
Randy Miller
Randy@rmwraps.com - 208-696-1180.
-
 • 9/8/26
Working on an Interior Yacht wrap Day 9 in the Gulf Shores using the Architectural finishes
See the progress on our interior yacht wrap project as we tackle the laundry room doors and surrounding cabin areas.
On day nine of this installation, the focus is on the laundry room door and its surrounding fixtures. We are applying architectural finishes to both sides of the door to ensure a consistent, high-end look throughout the cabin. This stage of the process requires careful attention to detail, especially when working on the lower sections where surfaces meet the floor.
This series provides a detailed look at the reality of yacht renovation. By documenting each day, you can see the specific techniques required for successful vinyl wrapping in a marine environment. We move methodically through the space, prepping and applying the material to cabinet doors and trim to achieve a durable, seamless finish.RM Elite Aero Yachts
Randy Miller
Randy@rmwraps.com - 208-696-1180.
-
 • 9/8/26
Working on an Interior Yacht wrap Day 10 in the Gulf Shores using the Architectural finishes
Follow our progress on day 10 of this interior yacht wrap project in the Gulf Shores, focusing on door and hallway finishes.
This footage covers the specific techniques used for installing doors, hallway construction, and refining the staircase and laundry area within the vessel. For those interested in high-end interior renovation, this walkthrough displays the level of detail required when applying architectural finishes to a complex marine environment.
We also look ahead to the final day of the project, which will involve window refinishing and material management for the remaining rooms. Seeing the installation process firsthand helps clarify how to achieve a professional vinyl installation on curved surfaces and tight spaces often found in luxury cabins and galleys.RM Elite Aero Yachts
Randy Miller
Randy@rmwraps.com - 208-696-1180.
-
 • 9/8/26
Ultimate Boat Interior Wrap Tour | Transforming with Architectural Films
See how to upgrade a boat interior with architectural films, covering the full 12-day preparation and installation process.
This project details the full restoration of a cabin using high-quality architectural films. We begin with a rigorous cleaning phase using tools from The Rag Company, rubbing alcohol, and ginger guards to ensure a pristine surface. Proper prep is the foundation for a durable finish on walls, cabinetry, and countertops.
The application phase requires precise heat control and consistent tension, especially on complex marine surfaces. By utilizing Primer 94 for edge sealing and applying a clear coat resin in high-wear areas, we ensure the vinyl installation holds up against harsh conditions. This 12-day breakdown demonstrates the technical steps required to achieve a factory-grade result on your own vessel.
Subscribe for weekly installation breakdowns, and let me know in the comments if you want to see tips on prepping other marine surfaces next.RM Elite Aero Yachts
Randy Miller
Randy@rmwraps.com - 208-696-1180.
-
 • 9/8/26
Working on wrapping a work boat using the Architectural Films - Day 1 in Louisiana
See the start of a boat interior wrap project using architectural films. Learn professional techniques for wall and door coverage.
This video documents Day 1 of a renovation project in Louisiana, focusing on the initial stages of applying textured gray and black surfaces to the interior of a work boat. The process highlights the importance of precise surface preparation and the specific half-inch overlap technique required to ensure the material adheres correctly to doors, trim, and tight spaces under windows.
By following this detailed look at our vinyl installation methods, you can see how we manage complex geometries within a marine environment. This project demonstrates the patience required to achieve a clean, durable finish on high-traffic areas, providing a practical guide for anyone interested in marine renovation or specialized adhesive applications.RM Elite Aero Yachts
Randy Miller
Randy@rmwraps.com - 208-696-1180.
-
 • 9/8/26
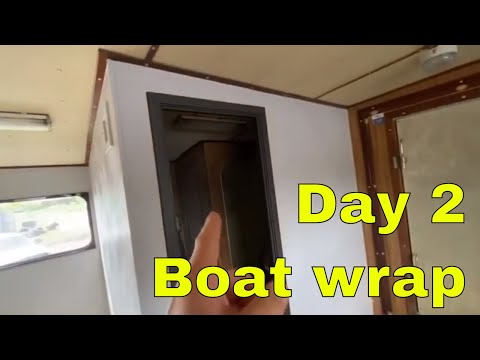
Working on wrapping a work boat using the Architectural Films - Day 2 in Louisiana
Follow the progress of a professional boat interior wrap as we install architectural films on day two of this renovation.
This project focuses on the interior renovation of a work boat, documenting the specific steps taken to cover interior walls, door frames, and staircases. We navigate the challenges of applying vinyl in a maritime environment, ensuring that each section is measured and adhered correctly for a durable, professional finish.
Capturing the texture and detail of the material on camera can be difficult, but this update highlights the practical vinyl installation techniques used for door jambs and vertical surfaces. Whether you are interested in marine upgrades or general surfacing methods, this journal provides a clear look at the daily workflow required for a large-scale marine vessel renovation project.RM Elite Aero Yachts
Randy Miller
Randy@rmwraps.com - 208-696-1180.
-
 • 9/8/26
Working on wrapping a work boat using the Architectural Films - Day 3 in Louisiana
Follow along with this boat interior wrap as we continue prepping raw wood surfaces for a professional finish. This day three journal covers essential surface preparation techniques.
Renovating a work boat requires careful attention to detail, especially when working with raw wood surfaces. In this segment, we focus on cleaning and prepping the interior areas, including the kitchen and seating, to ensure the architectural films adhere properly. We apply Zinsser guards to protect the wood, allowing it to cure for several days before the final application. This step is critical for achieving a durable, long-lasting result on the boat interior wrap.
Beyond the surface protection, the project involves replacing worn boards and updating hardware like door handles and knobs. By documenting our day-by-day progress, you can see the specific preparation methods needed to handle boat renovation projects correctly. Proper surface preparation remains the most important factor in ensuring the vinyl stays secure in a marine environment.RM Elite Aero Yachts
Randy Miller
Randy@rmwraps.com - 208-696-1180.
-
 • 9/8/26
Working on wrapping a work boat Deep cleaning time - Day 4 in Louisiana
Learn the essential prep work for a professional boat wrap. See how to deep clean and cut materials for a perfect finish.
This session focuses on the critical preparation phase required before applying architectural films to a work boat interior. Proper interior cleaning is the foundation of a long-lasting installation, so we use specialized agents to ensure every wall and corner is free of contaminants.
Beyond cleaning, we also cover the workflow for vinyl wrap prep to ensure a smooth application process. Taking the time to measure and cut your materials correctly prevents common installation errors and helps maintain high standards throughout the project.RM Elite Aero Yachts
Randy Miller
Randy@rmwraps.com - 208-696-1180.
-
 • 9/8/26
Working on wrapping a work boat Deep cleaning time - Day 5 in Louisiana
Learn the professional techniques for a boat wrap on day five of our project. See how we prep surfaces for a lasting finish.
This video documents the progress of wrapping walls and trim in a work boat, focusing on the hallway and stair areas. We cover the essential preparation steps, including using rubbing alcohol for cleaning and applying Primer 94 to improve adhesion. For any interior boat wrap project, proper surface prep is the difference between a long-lasting result and early failure.
We utilize high-quality architectural films to achieve a clean, polished aesthetic, even when working with leftover scraps. This step-by-step breakdown shows how we manage tricky corners and trim, ensuring the vinyl installation looks seamless. Whether you are a professional or looking to tackle your own marine project, these methods provide a clear path to a better visual finish.RM Elite Aero Yachts
Randy Miller
Randy@rmwraps.com - 208-696-1180.
-
 • 9/8/26
Working on wrapping a work boat using the Architectural Films - Day 6 in Louisiana
Follow along on Day 6 of our boat interior wrap project as we update the door trim and cabinetry for a cleaner look.
This six-hour session focuses on the precise application of architectural films to upgrade the cabin space. By comparing the before and after footage, you can see how proper vinyl wrapping techniques significantly improve the aesthetic of worn surfaces. We detail the prep work involved in handling cabinetry restoration to ensure a durable and professional finish that stands up to marine conditions.
The installation process requires careful attention to detail, especially when working around existing fixtures and trim. This project demonstrates how applying high-quality films can modernize a vessel without the need for a full interior demolition. We are currently prepping the countertop area and preparing to install doors and drawers as we continue moving toward the hallway section.RM Elite Aero Yachts
Randy Miller
Randy@rmwraps.com - 208-696-1180.
-
 • 9/8/26
Working on wrapping a work boat using the Architectural Films - Day 7 in Louisiana
Follow the progress on day 7 of our boat wrap project. See how we install architectural films on cabinetry and walls.
This journal documents the seventh day of our ongoing interior renovation of a boat. We focus on the precision required to wrap cabinetry, door trims, and walls, ensuring a seamless finish throughout the space. By looking at the details of these completed sections, you can observe the specific techniques used for overlapping and cut lines.
Proper tool usage is essential for achieving a professional look. We demonstrate the role of the squeegee in securing the material and removing air to ensure the vinyl installation holds up under the unique conditions of a marine environment. Whether you are a professional or a DIY enthusiast, understanding these application methods is key to a durable result.RM Elite Aero Yachts
Randy Miller
Randy@rmwraps.com - 208-696-1180.
-
 • 9/8/26
Working on wrapping a work boat using the Architectural Films - Day 8 in Louisiana
See the progress on this boat interior wrap as we install custom doors and finish the galley walls on day 8.
We are continuing the renovation of this work boat in Louisiana, focusing on the interior walls and the installation of three new doors. This stage of the project highlights the necessary surface preparation, including the use of Bondo, to ensure a smooth and professional application of our architectural films.
The galley area is also taking shape with new countertops and cabinets receiving attention. This boat interior wrap requires careful handling to achieve a durable finish, and we are prepping to apply white vinyl with a resin coat for added longevity. Proper vinyl installation is key to maintaining the high standards required for this type of boat renovation project.
Subscribe for weekly renovation breakdowns, and let me know in the comments if you want to see more details on our surface preparation techniques.RM Elite Aero Yachts
Randy Miller
Randy@rmwraps.com - 208-696-1180.
-
 • 9/8/26
Working on wrapping a work boat using the Architectural Films - Day 9 in Louisiana
Follow along on Day 9 of our boat interior wrap project as we prepare surfaces and apply architectural film for a custom look.
This phase of the project centers on cleaning and detailing the cabinetry. Proper surface preparation is the foundation of any quality vinyl installation, ensuring the material bonds correctly for a long-lasting finish. We use specific tools from The Rag Company to ensure every surface is free of debris before applying 3M Primer 94 to the cabinet door wraps.
Beyond the cleaning process, we are moving forward with the cabinet wrapping itself and finishing the interior trim work. Installing the doorknobs and preparing for new hinges keeps the workflow moving steadily toward the final result. Attention to detail at this stage prevents future lifting and ensures the wrap holds up to the unique environment of a boat
Subscribe for weekly project breakdowns and let me know in the comments what part of this boat renovation you want to see next.RM Elite Aero Yachts
Randy Miller
Randy@rmwraps.com - 208-696-1180.
-
 • 9/8/26
Working on wrapping a work boat using the Architectural Films - Day 10 in Louisiana
Follow along on day 10 of our boat wrap as we finalize the cabinetry doors and prep the interior for high-end film.
We are working through the interior of this vessel, focusing on cabinetry restoration to ensure a clean, durable finish. This specific phase involves cleaning surfaces and applying Zinsser guards to prepare the substrate for the vinyl application.
Having successfully wrapped and hung the lower cabinetry, the team is now moving to fine-tune the upstairs areas. Every step of this interior yacht wrap requires careful planning to stay on schedule while maintaining the quality standards expected of architectural films.RM Elite Aero Yachts
Randy Miller
Randy@rmwraps.com - 208-696-1180.
-
 • 9/8/26
Working on wrapping a work boat using the Architectural Films - Day 11 in Louisiana
Follow along on Day 11 of our boat wrap project. See how we apply epoxy resin for a durable finish on countertops.
This project focuses on the final stages of upgrading a work boat interior. We are applying a two-part epoxy resin to countertops and a bidet table to ensure the surfaces are bulletproof against heavy use. This step is critical for adding toughness to the architectural films used throughout the marine interior.
With one day remaining, this update covers the techniques used to achieve a seamless, high-performance finish. Whether you are interested in custom wraps or learning how to protect surfaces in high-traffic environments, this walkthrough provides a look at the patience required to complete a professional install.RM Elite Aero Yachts
Randy Miller
Randy@rmwraps.com - 208-696-1180.
-
 • 9/8/26
Interior Sailboat wrap using the Di-Noc Architectural Film. Showing the end project.
In this video, Randy Miller from RM Wraps showcases a stunning boat interior transformation using vinyl wraps. Over a 10-day process, he meticulously applies high-quality vinyl to walls, cabinetry, doors, and even curved surfaces, giving the boat a fresh, modern look without the need for costly renovations.
Randy explains the techniques he used, such as ensuring uniform wood grain patterns, utilizing butt joints and double cuts, and applying polyurethane for durability. He also highlights the benefits of wrapping over traditional remodeling, including affordability, customization, and ease of repair.
See how a professional boat interior wrap can refresh a cabin using 3M Di-Noc architectural film for a modern, durable finish.
This project highlights a full 10-day renovation of a sailboat cabin, replacing worn surfaces with high-quality vinyl. We cover the entire process, including matching wood grain patterns across cabinets and walls, and executing precise butt joints to ensure a seamless look. Whether you are interested in DIY marine upgrades or professional Sailboat wraps, this walkthrough shows how to handle curved surfaces and tricky tight spaces.
Durability is key in marine environments, so we detail the use of polyurethane coatings and proper adhesive primers like Zinsser Gards to ensure the vinyl holds up over time. This method offers a cost-effective alternative to traditional remodeling, allowing for customization that is easy to repair if damaged. You will see the before-and-after results, providing a clear look at how architectural film can completely update a boat interior.
RM Elite Aero Yachts
Randy Miller
Randy@rmwraps.com - 208-696-1180.
-
 • 9/8/26
Before wrapping the interior of the yacht video - Tacoma Washington
Join Randy Miller as he takes you through an exciting yacht transformation project in Tacoma! In this video, Randy showcases the before state of the yacht’s interior and explains how he will be wrapping cabinets, doors, and walls using high-quality architectural film with a white wood grain finish.
Introduction to the Yacht Wrapping Project - The video is presented by Randy Miller from RM Elite - The project involves wrapping the interior of a yacht with architectural film in a white wood grain finish. - The location of the project is Tacoma, and the process will take 4-5 days.
Areas Being Wrapped - Several areas inside the yacht are to be wrapped due to paint brush marks that the customer dislikes. - Specific areas include: - Cabinetry and walls - Doors and galley area - Underneath storage spaces - Steps and walls
Preparation and Wrapping Process - Existing Issues:The yacht's interior was hand-painted, leaving visible brush marks. - Preparation: - Some areas require sanding and Bondo application before wrapping. - The surface must be smooth for the architectural film to adhere properly. - Material Used: - A matte sheen wood grain architectural film will be applied. - Architectural films are easy to clean and provide a modernized look.
Work Schedule and Documentation - The work is done from 8 AM - 6 PM daily. - All progress is documented with videos and photos. - The company records materials used, time spent, and steps taken.
RM Elite Aero Yachts
Randy Miller
Randy@rmwraps.com - 208-696-1180.
-
 • 9/8/26
Luxury Yacht Interior Wrap Tour | Tacoma, Washington Transformation in Tacoma Washington
See the full yacht interior wrap process using white wood grain architectural films to refresh this boat cabin.
Randy Miller demonstrates a five-day project applying high-quality architectural films to a yacht interior. This guide covers the installation techniques used to achieve a clean, professional finish on galley walls and small surfaces without permanent modifications.
We focus on the estimation process and material handling required for custom wrap solutions. By reviewing this boat interior renovation, you can see how specific textures and films provide a cost-effective way to update aging maritime surfaces.RM Elite Aero Yachts
Randy Miller
Randy@rmwraps.com - 208-696-1180.
-
 • 9/8/26
Yacht interior wrap - Day 5 Journal - Tacoma Washington
Follow the progress of a yacht interior wrap on day five, focusing on finishing edges and intricate trim details.
This project in Tacoma, Washington, demonstrates the precision required for high-end boat wrapping. On this fifth day of the journal, the focus shifts to completing the edges, entertainment center sections, and various small ledges that require careful handling.
We show the technique for wrapping underneath surfaces to ensure a clean, professional finish. Using architectural film requires steady hands and patience to avoid common installation errors when dealing with complex geometries. Proper surface preparation is the key to achieving a long-lasting result on these specialized marine components during any vinyl installation.
Subscribe for weekly vinyl installation breakdowns, and let me know in the comments if you want to see tips on finishing smaller interior details next.RM Elite Aero Yachts
Randy Miller
Randy@rmwraps.com - 208-696-1180.
-
 • 9/8/26
Yacht interior wrap - Day 4 Journal - Tacoma Washington
See the precision required for a yacht interior wrap as we hit Day 4 of this Tacoma project, tackling complex corners.
This journal documents the fourth day of our yacht interior wrap in Tacoma, Washington. We focus on the application process for complex surfaces, including doors and corners, often completing challenging sections in a single piece to ensure a seamless finish. This stage is critical for maintaining consistency across the vessel as we approach the final sections.
Using high-quality architectural film, we demonstrate the specific techniques needed for tight spaces. Proper boat detailing and methodical vinyl installation are essential to prevent lifting and ensure the material adheres correctly to the substrate. We share these steps to highlight how professional installers manage intricate geometry and surface preparation before moving into the final project phase.RM Elite Aero Yachts
Randy Miller
Randy@rmwraps.com - 208-696-1180.
-
 • 9/8/26
Yacht interior wrap - Day 3 Journal - Tacoma Washington
Follow along with this yacht interior wrap as we tackle complex curves and door detailing on day three of the project.
This journal entry documents the specific techniques used to wrap a curved section of the yacht, including precise tucking methods around the door frame. Achieving a clean finish on these surfaces requires tucking the architectural film five to six inches deep to ensure durability against the marine environment. We focus on the patience and steady hand required to manage material tension across irregular geometries.
By documenting our yacht wrap progress, we provide transparency for the customer and insight for other installers working on luxury marine upgrades. Proper preparation and methodical application are the main factors in achieving a seamless aesthetic that stands up to constant use. Whether you are a professional installer or a boat owner considering a renovation, this day-by-day look highlights the careful planning behind every section of the install.RM Elite Aero Yachts
Randy Miller
Randy@rmwraps.com - 208-696-1180.
-
 • 9/8/26
Yacht interior wrap - Day 2 Journal - Tacoma Washington
Follow our yacht interior wrap process as we detail tricky corners and kitchen components on Day 2 in Tacoma.
Applying high-quality architectural film to custom marine woodwork requires intense focus on small details. In this update, we walk through the specific techniques used for the galley pull-out trash bin and the island area, where precision trimming is essential for a clean, professional finish.
We show the results of our work on these complex surfaces, highlighting how a proper vinyl installation ensures the material stays durable and seamless. By managing these difficult edges, we create a cohesive look that stands up to the demands of a boat interior.RM Elite Aero Yachts
Randy Miller
Randy@rmwraps.com - 208-696-1180.
-
 • 9/8/26
Yacht interior wrap - Day 1 Journal - Tacoma Washington
Day one journal - working on the interior of the yacht using the architectural film. RM wraps always records what they are doing by videos, pictures, time and other stuff and add it to the google doc. Rm shares the journal with the customer. Here’s 1 sample of a video.
RM Elite Aero Yachts
Randy Miller
Randy@rmwraps.com - 208-696-1180.
-
 • 9/8/26
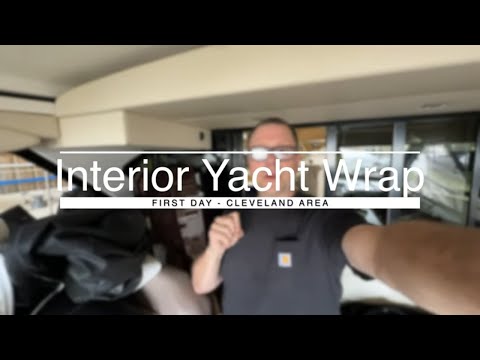
How We Wrapped a Yacht with 3M Di-Noc Day 1
Day 1 Cleveland
Join Randy as he takes you behind the scenes of Day 1 of an yacht interior vinyl wrap project using 3M Di-Noc PW-2328MT woodgrain architectural vinyl.
🛠️ What's Covered: -
Customer requests and planning
- Hardware removal and organization
- Deep cleaning techniques for vinyl prep
- Primer and vinyl adhesion
- How to manage difficult surfaces and edges
- Daily communication via video emails
- Documenting progress with photos and Google Photos 📦
Materials Used:
- 3M Di-Noc PW-2328MT
- Zinsser Gardz Primer
- 3M Primer 94 for edge adhesion
- Invisible Glass Cleaner
RM Elite Aero Yachts
Randy Miller
Randy@rmwraps.com - 208-696-1180.
-
 • 9/8/26
Transforming My Yacht with 3M Di-Noc
Day 3 - Cleveland
Join Randy as he takes you behind the scenes of Day 3 of an yacht interior vinyl wrap project using 3M Di-Noc PW-2328MT woodgrain architectural vinyl.
Main Tasks Completed:
- Finished wrapping the cabinet doors on both sides.
- Applied Zinsser Guard to protect various components and surfaces.
- Wrapped and detailed door frames and unit sections.
Detailing & Touch-ups:
- Small vinyl scraps used to temporarily cover unfinished areas for protection.
- A focus on cleanliness and professional appearance, even in interim stages.
- Showcases completed sections, expressing satisfaction with the quality and aesthetic.
RM Elite Aero Yachts
Randy Miller
Randy@rmwraps.com - 208-696-1180.
-
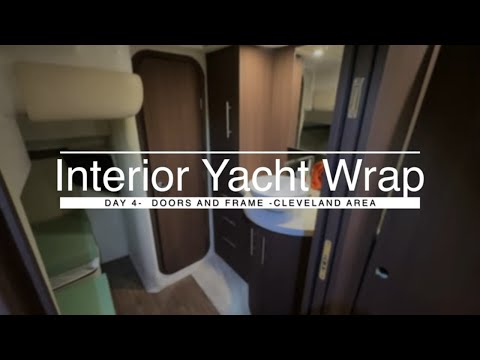 • 9/8/26
Transforming a Yacht with 3M Di-Noc Wraps Day 4
Day 4 - Cleveland
Join Randy as he takes you behind the scenes of Day 4 of an yacht interior vinyl wrap project using 3M Di-Noc PW-2328MT woodgrain architectural vinyl.
Work Completed
1. Door and Frame Wrapping
- Wrapped the main door and surrounding frame with a single sheet to maintain wood grain alignment.
- Emphasized grain matching for visual consistency on both sides.
Shower Area Details
- Carefully wrapped the shower doors using one continuous piece.
- Tucked the vinyl over and around the edges to ensure waterproofing and prevent peeling.
- Avoided cutting over sensitive joints to enhance durability.
Panel Preparation
- Removed parts of the interior structure to make the wrap appear as a single, seamless surface.
- Prepped for wrapping three out of four doors, leaving one for the next day.
RM Elite Aero Yachts
Randy Miller
Randy@rmwraps.com - 208-696-1180.
-
 • 9/8/26
Working on an interior sail boat wrap Day 2 using Architectural finishes Whidbey Island Washington
In this video, Randy Miller takes us through Day 2 of a boat interior wrapping project, showcasing the transformation process using Bondo and Di-Noc vinyl wrap. He details the steps involved in wrapping the galley, walls, doors, trim moldings, and fuse panels, ensuring a smooth and professional finish. Randy also shares insights on prepping surfaces with Bondo to achieve the best results.
RM Elite Aero Yachts
Randy Miller
Randy@rmwraps.com - 208-696-1180.
-
 • 9/8/26
Working on an interior sail boat wrap Day 3 using Architectural finishes Whidbey Island Washington
In this video, we continue with Day 3 of wrapping the interior of a boat. The focus is on detailing the progress made, including wrapping various sections such as corners, doors, behind steps, and edges to create a seamless and professional look. The host also discusses plans to either tackle another wrapping project or perform a final cleanup, ensuring that everything looks uniform and built-in.
RM Elite Aero Yachts
Randy Miller
Randy@rmwraps.com - 208-696-1180.
-
 • 8/28/26
Working on an Interior Work Boat vinyl wrapping the doors and custom printed fridge wrap - Day 1
Proper boat wrap preparation is the difference between a long-lasting finish and a project that fails in months. See the first day of our process at RM Wraps.
Starting a marine aesthetic upgrade requires stripping everything back to basics. The first day is dedicated to the tedious, necessary labor that ensures the final vinyl wrap installation holds up against harsh water conditions. We remove all handles and hardware, then move into the heavy lifting: sanding down the icebox area and applying Bondo to create a perfectly smooth surface.
Beyond the vinyl work, we address interior elements like doors, which often need a fresh coat of paint to match the new color scheme. This level of surface cleaning and structural repair is what truly defines professional boat restoration. By focusing on these foundations rather than just the aesthetic layer, we ensure the final product adheres flawlessly.
RM Elite Aero Yachts
Randy Miller
Randy@rmwraps.com - 208-696-1180.
-
 8/26/26
Day 4 Working on the private Jet project using the 3M Di-Noc vinyl
Overview • Day 4 of the private jet refurbishment project. • Focus on using 3M Di-Noc vinyl for interior updates, including disassembly, preparation, and wrapping.
RM Elite Aero Yachts
Randy Miller
Randy@rmwraps.com - 208-696-1180.
-
 8/26/26
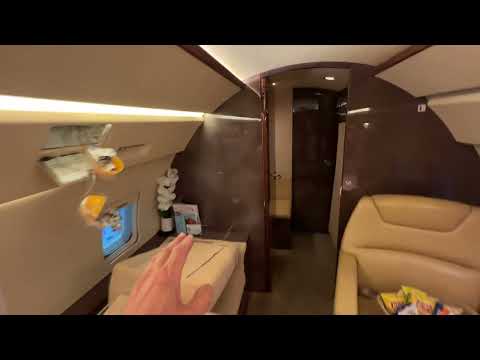
First day working on a private jet wrap using 3M Di-Noc vinyl
Day 1: Preparation for Vinyl Wrapping
Disassembly and Preparations
• Curtains and Accessories Removal:
• Remove curtains and velcroed components.
• Unscrew and detach hardware such as panels and fixtures for easier access.
• Doors and Handles:
• Doors will be detached for better wrap coverage, especially around the edges.
• Handles and hardware will be removed to ensure smooth wrapping.
• Other Structural Adjustments:
• Parts like chairs and panels will be removed to access and wrap underlying areas.
• Damaged or worn-out lacquered surfaces will need additional preparation.
Vinyl Wrapping Approach
• Target Areas:
• Focus on wooden parts of the structure, ensuring thorough coverage.
• Removal of stickers and applying new ones as needed.
• Technique:
• Utilize precise cutting and handle reinstallation post-wrapping.
• Apply primer (Primer 94) and Ziner guards to ensure better adhesion and durability of the vinyl.
Repairs and Final Preparations
• Damage Assessment:
• Minor damage identified for patchwork before wrapping.
• Special Requirements:
• Customer-supplied vinyl print for specific sections.
• Ziner guards will be used extensively for walls and critical areas.
RM Elite Aero Yachts
Randy Miller
Randy@rmwraps.com - 208-696-1180.
-
 • 9/8/26
Transforming My Yacht's Interior with 3M Di-Noc Day 2
Day 2 Cleveland
Join Randy as he takes you behind the scenes of Day 2 of an yacht interior vinyl wrap project using 3M Di-Noc PW-2328MT woodgrain architectural vinyl.
🛠️ What's Covered:
1. Galley Doors and Cabinets - Wrapped both sides of cabinet doors. - Included attention to bottom edges and hidden surfaces visible through side windows.
2. Extra Touches and Detail Work - Added rubber stoppers from Home Depot to prevent door slamming. - Matched wood grain patterns on the fuse box cover to ensure seamless appearance.
3. Entertainment/Fuse Panel Area - Wrapped the entertainment center and fuse box cabinet, emphasizing grain alignment. - Showed extra commitment to customer satisfaction by replicating client-desired visual details.
4. Workstation and Tools
Maintains a clean, organized setup using soft bench dogs to avoid surface damage. - Demonstrates method of lifting and cutting vinyl to maintain accuracy and cleanliness.
RM Elite Aero Yachts
Randy Miller
Randy@rmwraps.com - 208-696-1180.
-
 • 8/26/26
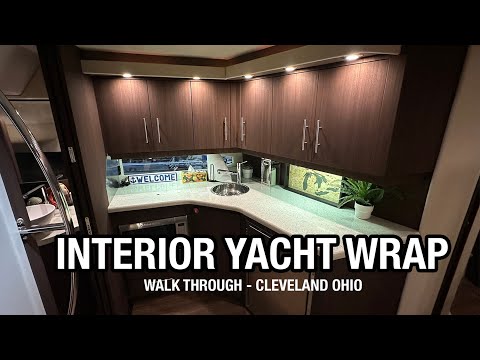
Yacht Interior Wrap Using 3M Di-Noc | Cleveland - Final Walkthrough
Join Randy as he takes you behind the scenes of the final day of an yacht interior vinyl wrap project using 3M Di-Noc PW-2328MT woodgrain architectural vinyl.
See the final walkthrough of a professional yacht interior wrap using high-end architectural film. Discover how premium finishes update a living space.
This project demonstrates the application of 3M Di-Noc on custom cabinetry and living surfaces within a luxury vessel. We focus on the precision required to achieve a clean, modern aesthetic that turns a standard cabin into a refined mobile apartment. By utilizing durable materials, we ensure the upgrade stands up to the unique environment of a boat interior while maintaining a high-end look.
The walkthrough highlights how specific material choices impact the overall feel of the living area. Proper preparation and expert application techniques are the primary factors in ensuring the vinyl remains smooth and secure over time. Whether you are considering a renovation for your own vessel or looking to understand the capabilities of architectural vinyl for marine use, this breakdown illustrates the meticulous process behind a successful finish.
RM Elite Aero Yachts
Randy Miller
Randy@rmwraps.com - 208-696-1180.