
Learn the professional technique for wood grain matching to ensure your component assembly results in a seamless wood finish.
Achieving a high-quality look requires precision when aligning materials. This guide walks through the specific steps for preparing trays and positioning pieces so the patterns align perfectly across the entire surface.
Applying these woodworking techniques helps you maintain a cohesive aesthetic, especially when working with patterned materials. By focusing on the orientation of each piece before final installation, you can avoid common errors that disrupt the visual flow of the final product. Wood grain matching is the preferred way to achieve a professional result.
RM Elite Aero Yachts
Randy Miller
Randy@rmwraps.com - 208-696-1180.
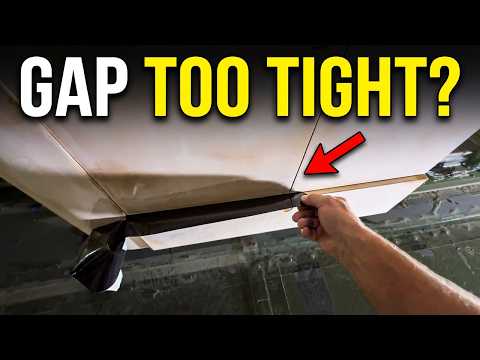
See the precise architectural film application process for interior surfaces. Learn the technique for a smooth finish.
Randy like to make a thickness testing from the Di-noc material. He layers 4 Di-noc strips together the make 32 mils thick. This makes sure the the door close ok without rubbing, The film will last a lot longer on the subjects too.
This demonstration focuses on applying 8-mil thick Di-noc material to intricate, curved geometry. For professionals working in high-end environments like yachts or private jets, managing material tension in tight spaces is essential for a clean, durable result.
We show the manual techniques required for a smooth curved surface wrap, ensuring the film conforms perfectly without lifting. This method emphasizes patience and layered precision, which are standard requirements for quality interior finishing. Mastering these steps helps avoid common vinyl installation failures on high-value assets.
RM Elite Aero Yachts
Randy Miller Randy@rmwraps.com - 208-696-1180.

This video demonstrates a precise technique for applying textured film, emphasizing proper overlapping for a good finish. Learn how to achieve professional results for your next home improvement project with this easy-to-follow guide. For more intricate details, download the "Dry Apply Installation Guide" from rmwraps.com to master this do it yourself application.
Surface Preparation: After the first piece of vinyl is installed, use painter's tape to mark a half-inch overlap [00:47]. Sand the textured surface of the base vinyl with 180 or 220 grit sandpaper to ensure it is smooth [00:54].
Cleaning: Use a lint-free rag with glass cleaner or rubbing alcohol to remove any debris from the sanded area [01:10].
Adhesion Promotion: Apply Primer 94 with a cotton swab to the area where the overlap will occur and let it dry for a few minutes [01:21].
Alignment Strategy: Use small tape "tags" as visual guides for the half-inch mark, which is especially helpful when working at heights or on large walls [01:43].
Squeegee and Heat: Use a specialized architectural film squeegee to press the film down [02:42]. Follow up with post-heating using a heat gun to activate the adhesive and soften the vinyl for a permanent bond [03:02].
RM Elite Aero Yachts
Randy Miller
Randy@rmwraps.com - 208-696-1180.

What does it take to prepare materials for a private jet burn test? In this video, Randy walks you through the exact, meticulous process required before a aircraft interior film can be tested for safety. To ensure the test is accurate, we have to replicate the precise installation process used for 3M™ DI-NOC™ Architectural Film on a real surface.
The Step-by-Step Prep Process: Step
1: Cleaning – Preparing and clearing the surface of any contaminants. Step
2: Sealing – Applying Zinsser Gardz and allowing it to completely dry for 2 to 3 hours. Step
3: Priming – Applying Primer 94 strictly to the edges of the 3" x 14" sample strips. Step 4: Installation – Wrapping the subject flawlessly with the DI-NOC film.
RM Elite Aero Yachts
Randy Miller
Randy@rmwraps.com - 208-696-1180.

Randy demonstrates the reasons behind our decision to utilize the Gardz on all surfaces we covered with the Di-noc material. We had to remove the 3M DI-noc from the surface to address specific issues. Randy intends to illustrate the difficulty of removing the vinyl from the surface.
RM Elite Aero Yachts
Randy Miller
Randy@rmwraps.com - 208-696-1180.
